Exterior Wall Cladding Systems
in San Jose, CA
Exterior Wall Systems Installed by San Jose's Experienced Cladding Contractor
Free Estimates
Free On-Site Consultations
What Is an Exterior Wall Cladding System?
An exterior wall cladding system is the complete assembly of components that forms the outer protective layer of a building’s wall construction. It begins at the structural sheathing, which is the outermost layer of the building’s structural frame, and extends to the finished exterior surface that you see from the street.
A complete cladding system includes the following components working together.
Structural sheathing: The rigid panel product, typically oriented strand board or plywood, that is fastened to the building’s stud framing and forms the structural substrate for everything that comes after it. The sheathing’s condition directly affects the performance of every layer above it.
Water-resistive barrier: A continuous membrane layer installed over the sheathing that prevents bulk water from reaching the framing and insulation while allowing moisture vapor to escape from the wall cavity to the exterior. The WRB is the last line of defense against moisture intrusion and is the most consequential installation in the entire cladding system.
Flashing: Sheet metal, flexible membrane, or composite flashing products installed at every opening, penetration, horizontal transition, and material interface in the wall system to direct water away from vulnerable locations and prevent it from entering the wall assembly at the points where the WRB alone is insufficient.
Drainage plane and air cavity (where applicable): In rainscreen assemblies, a furring strip layer or drainage mat product creates a defined air space between the WRB and the cladding face, providing a drainage path for any moisture that penetrates the outer surface and an airflow path for active drying of the cavity.
Cladding material: The exterior-facing product, whether fiber cement, composite wood, metal panels, stucco, wood siding, architectural concrete, phenolic panels, or another system, that provides the finished appearance and the primary weather barrier for the wall assembly.
Trim, corner, and transition components: The ancillary products at corners, windows, doors, rakes, fascias, and transitions between cladding systems that complete the weather seal and provide the finished architectural detail of the exterior.
When all of these components are correctly selected, specified, and installed as a coordinated system, the exterior wall performs as intended for decades. When any one of them is inadequate, the entire system is compromised regardless of how good the other components are.
Why a Systems Approach Matters for San Jose Buildings
San Jose’s building stock includes properties across a wide range of ages, construction types, and exterior wall configurations. Understanding how each building’s existing wall assembly functions, and where it is failing, is essential to specifying a cladding system that actually solves the problems the property is experiencing rather than simply replacing the surface material.
Older San Jose Homes
Homes built in San Jose from the 1940s through the 1980s were typically constructed with wall assemblies that would not meet today’s moisture management standards. Asphalt felt paper as the sole WRB, no drainage plane, and limited flashing at openings were standard practice throughout that era. Many of these homes have experienced repeated moisture-related failures at exterior walls, windows, and horizontal trim surfaces, and their owners have addressed those failures with repeated repairs to the surface material without correcting the underlying wall assembly deficiencies.
For these properties, re-cladding is most valuable when it includes a complete reassessment of the wall assembly and the installation of updated moisture management components, not just a new surface material. Replacing failing wood siding with fiber cement on top of the same inadequate WRB and flashing system does not address the moisture management problem. It delays the next symptom by a few years and delivers the same eventual outcome.
Contemporary Construction and New Builds
New construction and major renovation projects in San Jose now benefit from significantly better code requirements and industry practice for exterior wall moisture management than were in place a generation ago. California’s building code specifies minimum standards for WRB installation, flashing at openings, and drainage gaps in certain cladding applications. Specifying a complete cladding system that meets or exceeds those standards from the outset of a project produces a wall assembly with a substantially longer service life and lower lifetime maintenance cost than minimum code compliance alone.
Commercial Buildings
Commercial buildings in San Jose and throughout Silicon Valley face exterior wall performance demands that residential construction does not always encounter: greater height, higher wind loads, more complex facade geometry, multiple cladding materials in a single facade composition, and longer expected service lives before major renovation. Correctly specified commercial exterior wall cladding systems address all of these factors in a coordinated assembly design rather than treating each component as an independent selection.
Exterior Wall Cladding Systems We Install in San Jose
We install the complete range of modern exterior wall cladding systems for San Jose residential and commercial clients. Here is an overview of the primary systems and their appropriate applications.
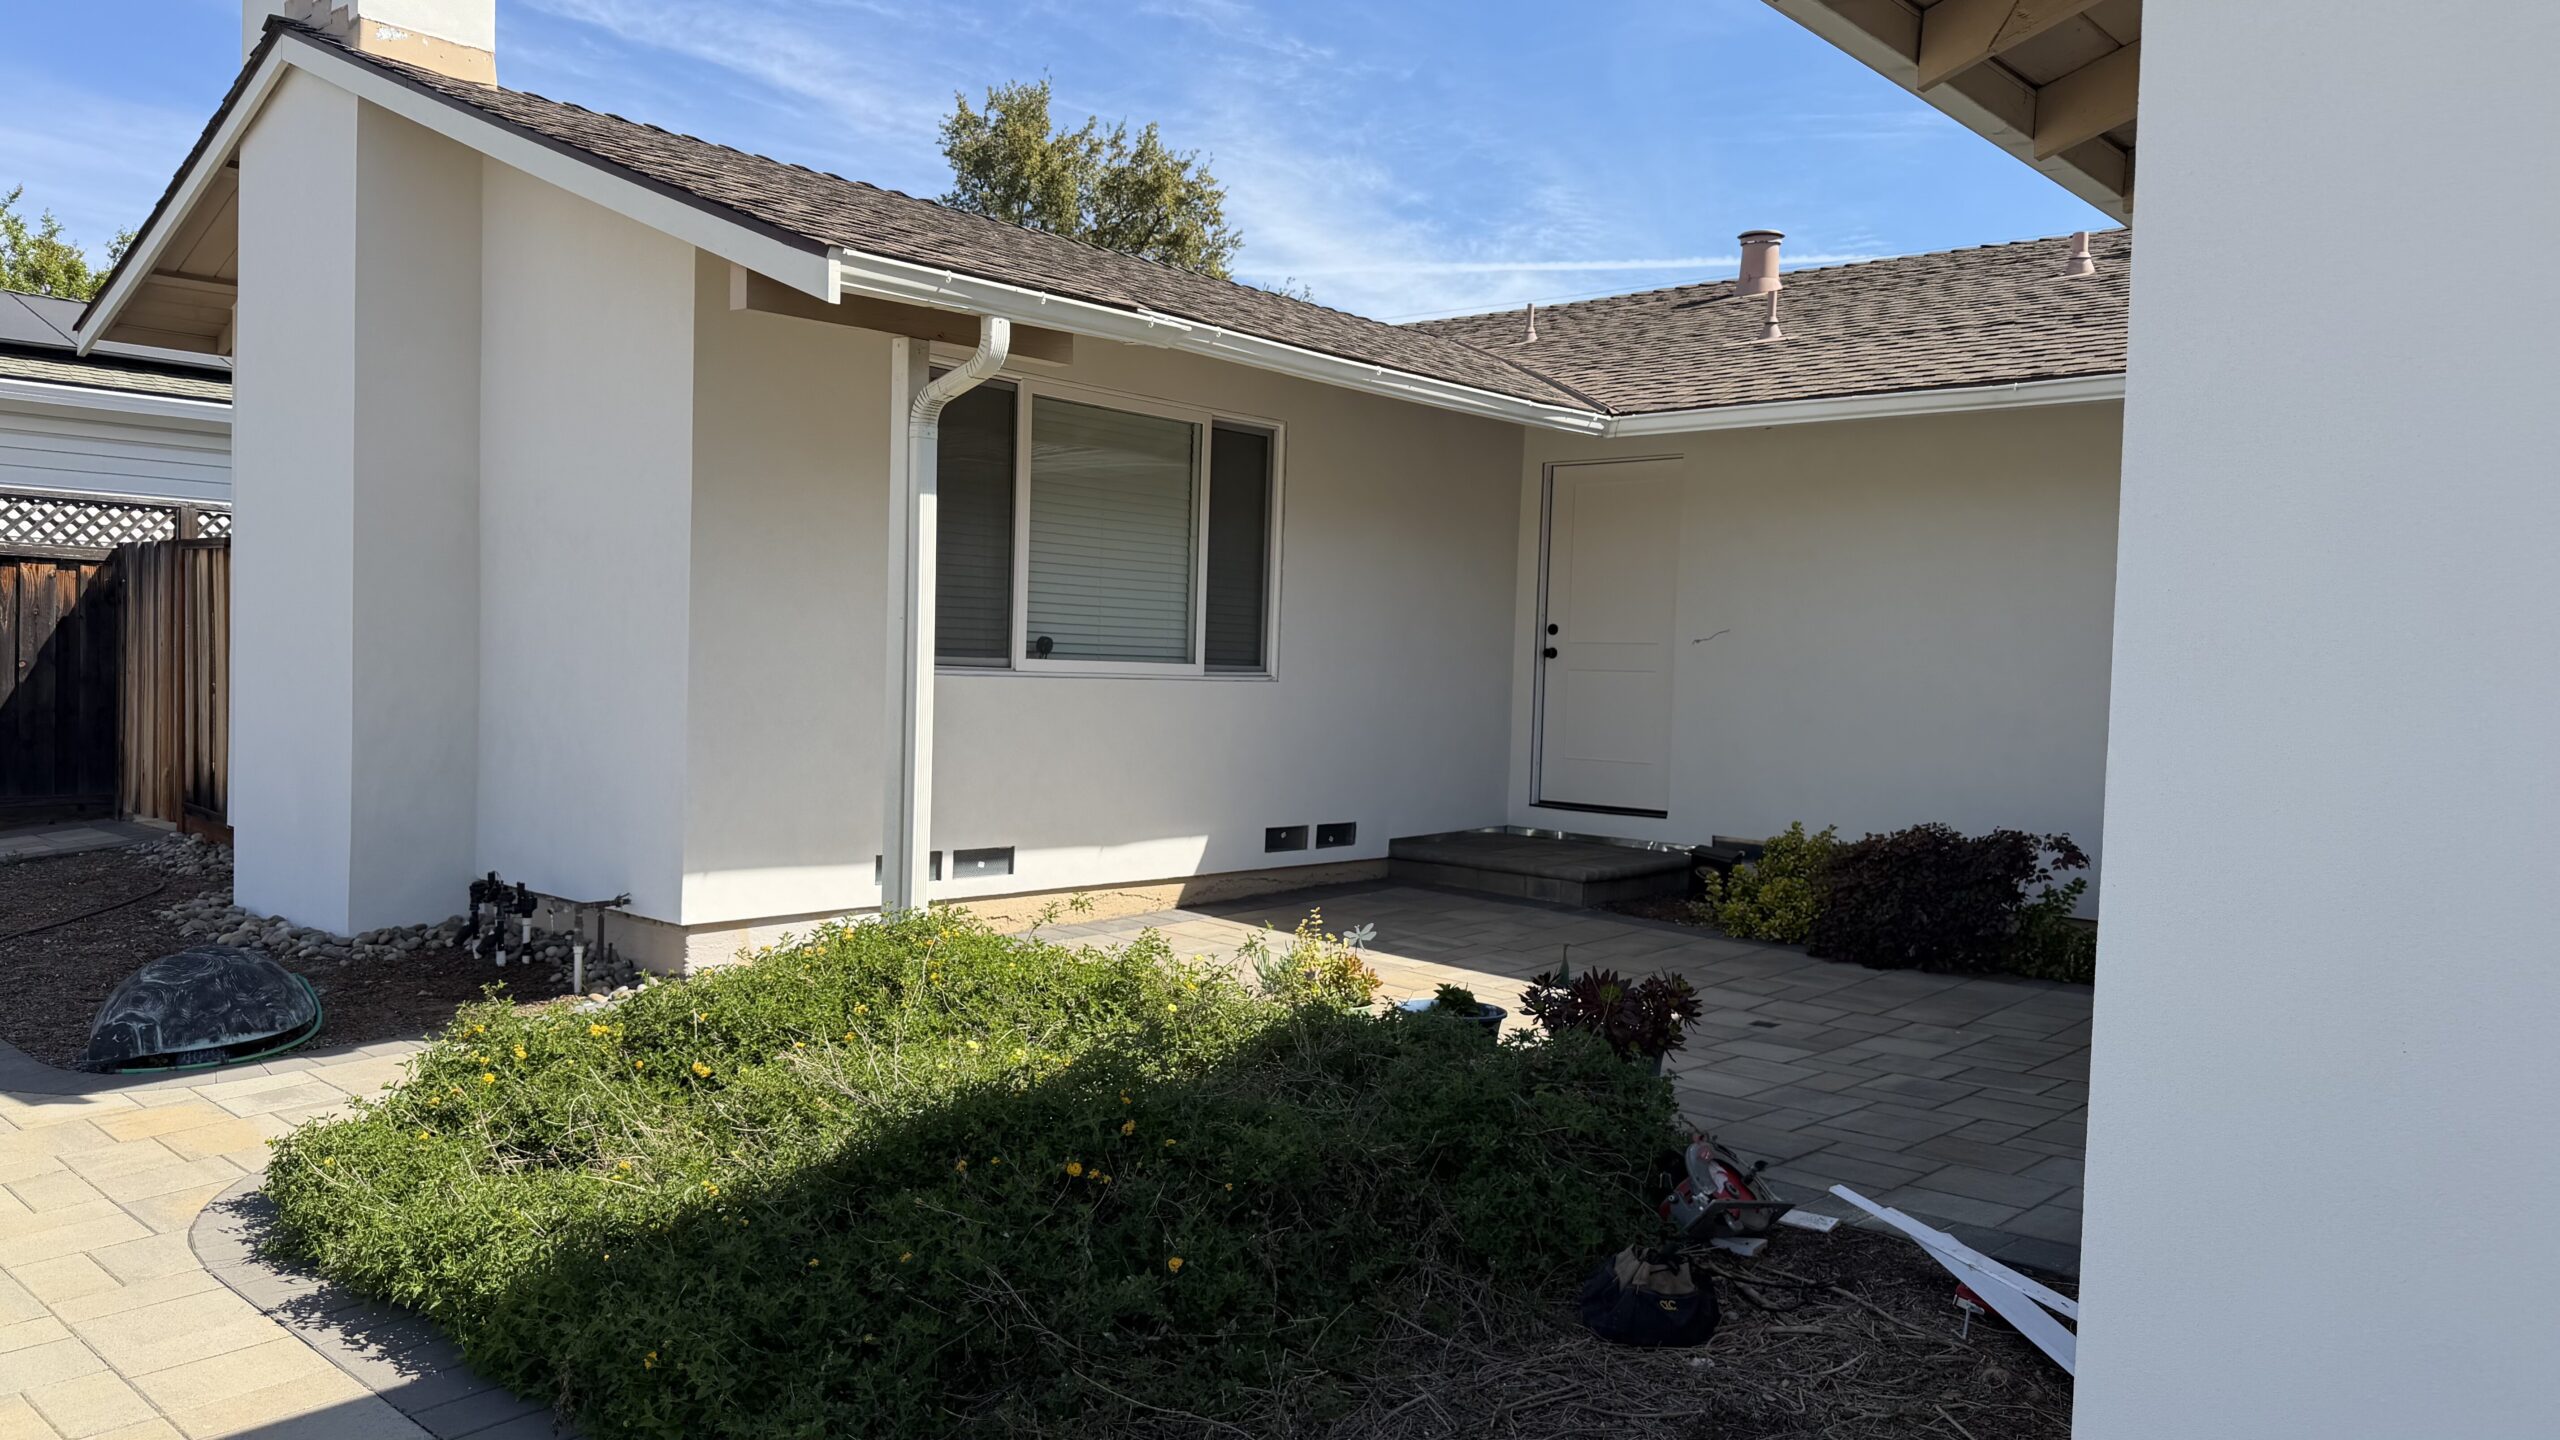
Stucco Wall Systems
Stucco remains one of the most widely used exterior cladding systems in California and a significant part of our own practice as a stucco contractor. A correctly installed three-coat stucco system over a properly prepared substrate and correctly installed WRB and flashing is a durable, long-performing exterior finish well-suited to the Bay Area’s climate.
The problems that San Jose homeowners commonly associate with stucco, including cracking, moisture intrusion, and efflorescence, are in most cases the result of system-level deficiencies: inadequate WRB installation, incorrect or missing flashing at openings and transitions, improper control joint placement, or substrate conditions that were not addressed before the stucco was applied. Correctly executed stucco systems do not exhibit these problems at the rates that improperly executed ones do.
We install new stucco systems, re-stucco over existing substrates, and perform stucco repair and restoration as part of our complete exterior cladding practice.
Fiber Cement Cladding Systems
Fiber cement cladding systems using James Hardie and similar products are among the most commonly specified residential exterior wall systems in San Jose. A complete fiber cement system includes the WRB and flashing layers, a drainage gap where rainscreen installation is appropriate, the fiber cement siding and trim products, and the finish paint or factory-applied ColorPlus coating.
The long-term performance of a fiber cement cladding system depends heavily on the moisture management layers beneath the surface. Fiber cement installed with a correctly specified WRB, integrated flashing at all openings, and a drainage gap behind the siding outperforms the same product installed tight to an inadequate WRB by a wide margin over the life of the installation.
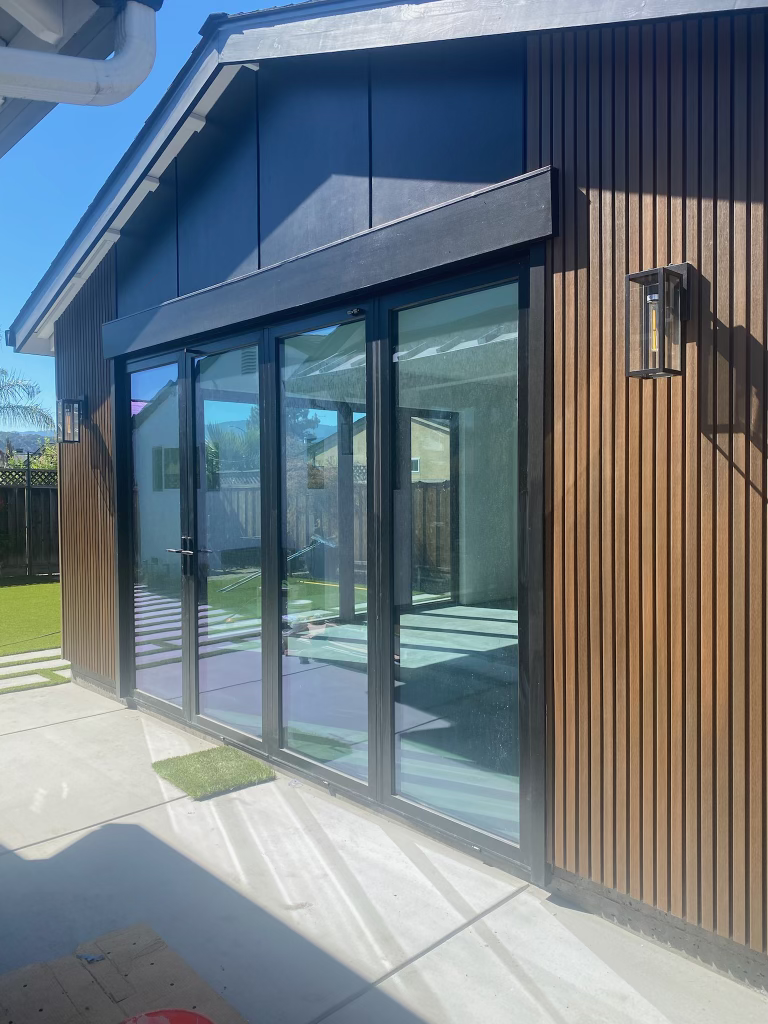
Composite Wood Cladding Systems
Composite wood cladding systems, including LP SmartSide and similar products, deliver a natural wood appearance with substantially better moisture resistance than solid lumber. A complete composite wood system includes back-primed siding boards installed over a continuous WRB with correctly detailed flashing and, where appropriate, a rainscreen cavity. These systems are particularly well-suited for San Jose neighborhoods like Willow Glen and Naglee Park where the warm character of wood siding is consistent with the architectural context.
Metal Panel Cladding Systems
Metal panel cladding systems, including ACM panels, decorative aluminum panels, and architectural metal panel products, are predominantly used in commercial construction throughout San Jose and Silicon Valley but are increasingly specified on contemporary residential projects as well. A complete metal panel system includes the structural attachment system, the WRB behind the panels, the panel products themselves with their factory-applied finishes, and the joint treatment and transition details that complete the weather seal.
Metal panel systems installed as rainscreen assemblies, with a defined air cavity between the panel back face and the WRB, represent some of the highest-performing exterior wall assemblies in the commercial building market. The combination of durable metal panel surfaces, a ventilated drainage plane, and a correctly installed WRB produces a wall system with an excellent long-term moisture management record.
Phenolic and HPL Panel Systems
Phenolic resin and high-pressure laminate panel systems are designed for ventilated facade applications and are widely used in institutional, healthcare, and commercial construction across the South Bay. They are installed as complete ventilated rainscreen assemblies using manufacturer-supplied attachment hardware that creates the required air cavity as part of the standard installation. Their UV resistance, chemical resistance, and dimensional stability under moisture cycling make them one of the most technically capable exterior cladding systems available for demanding commercial applications.
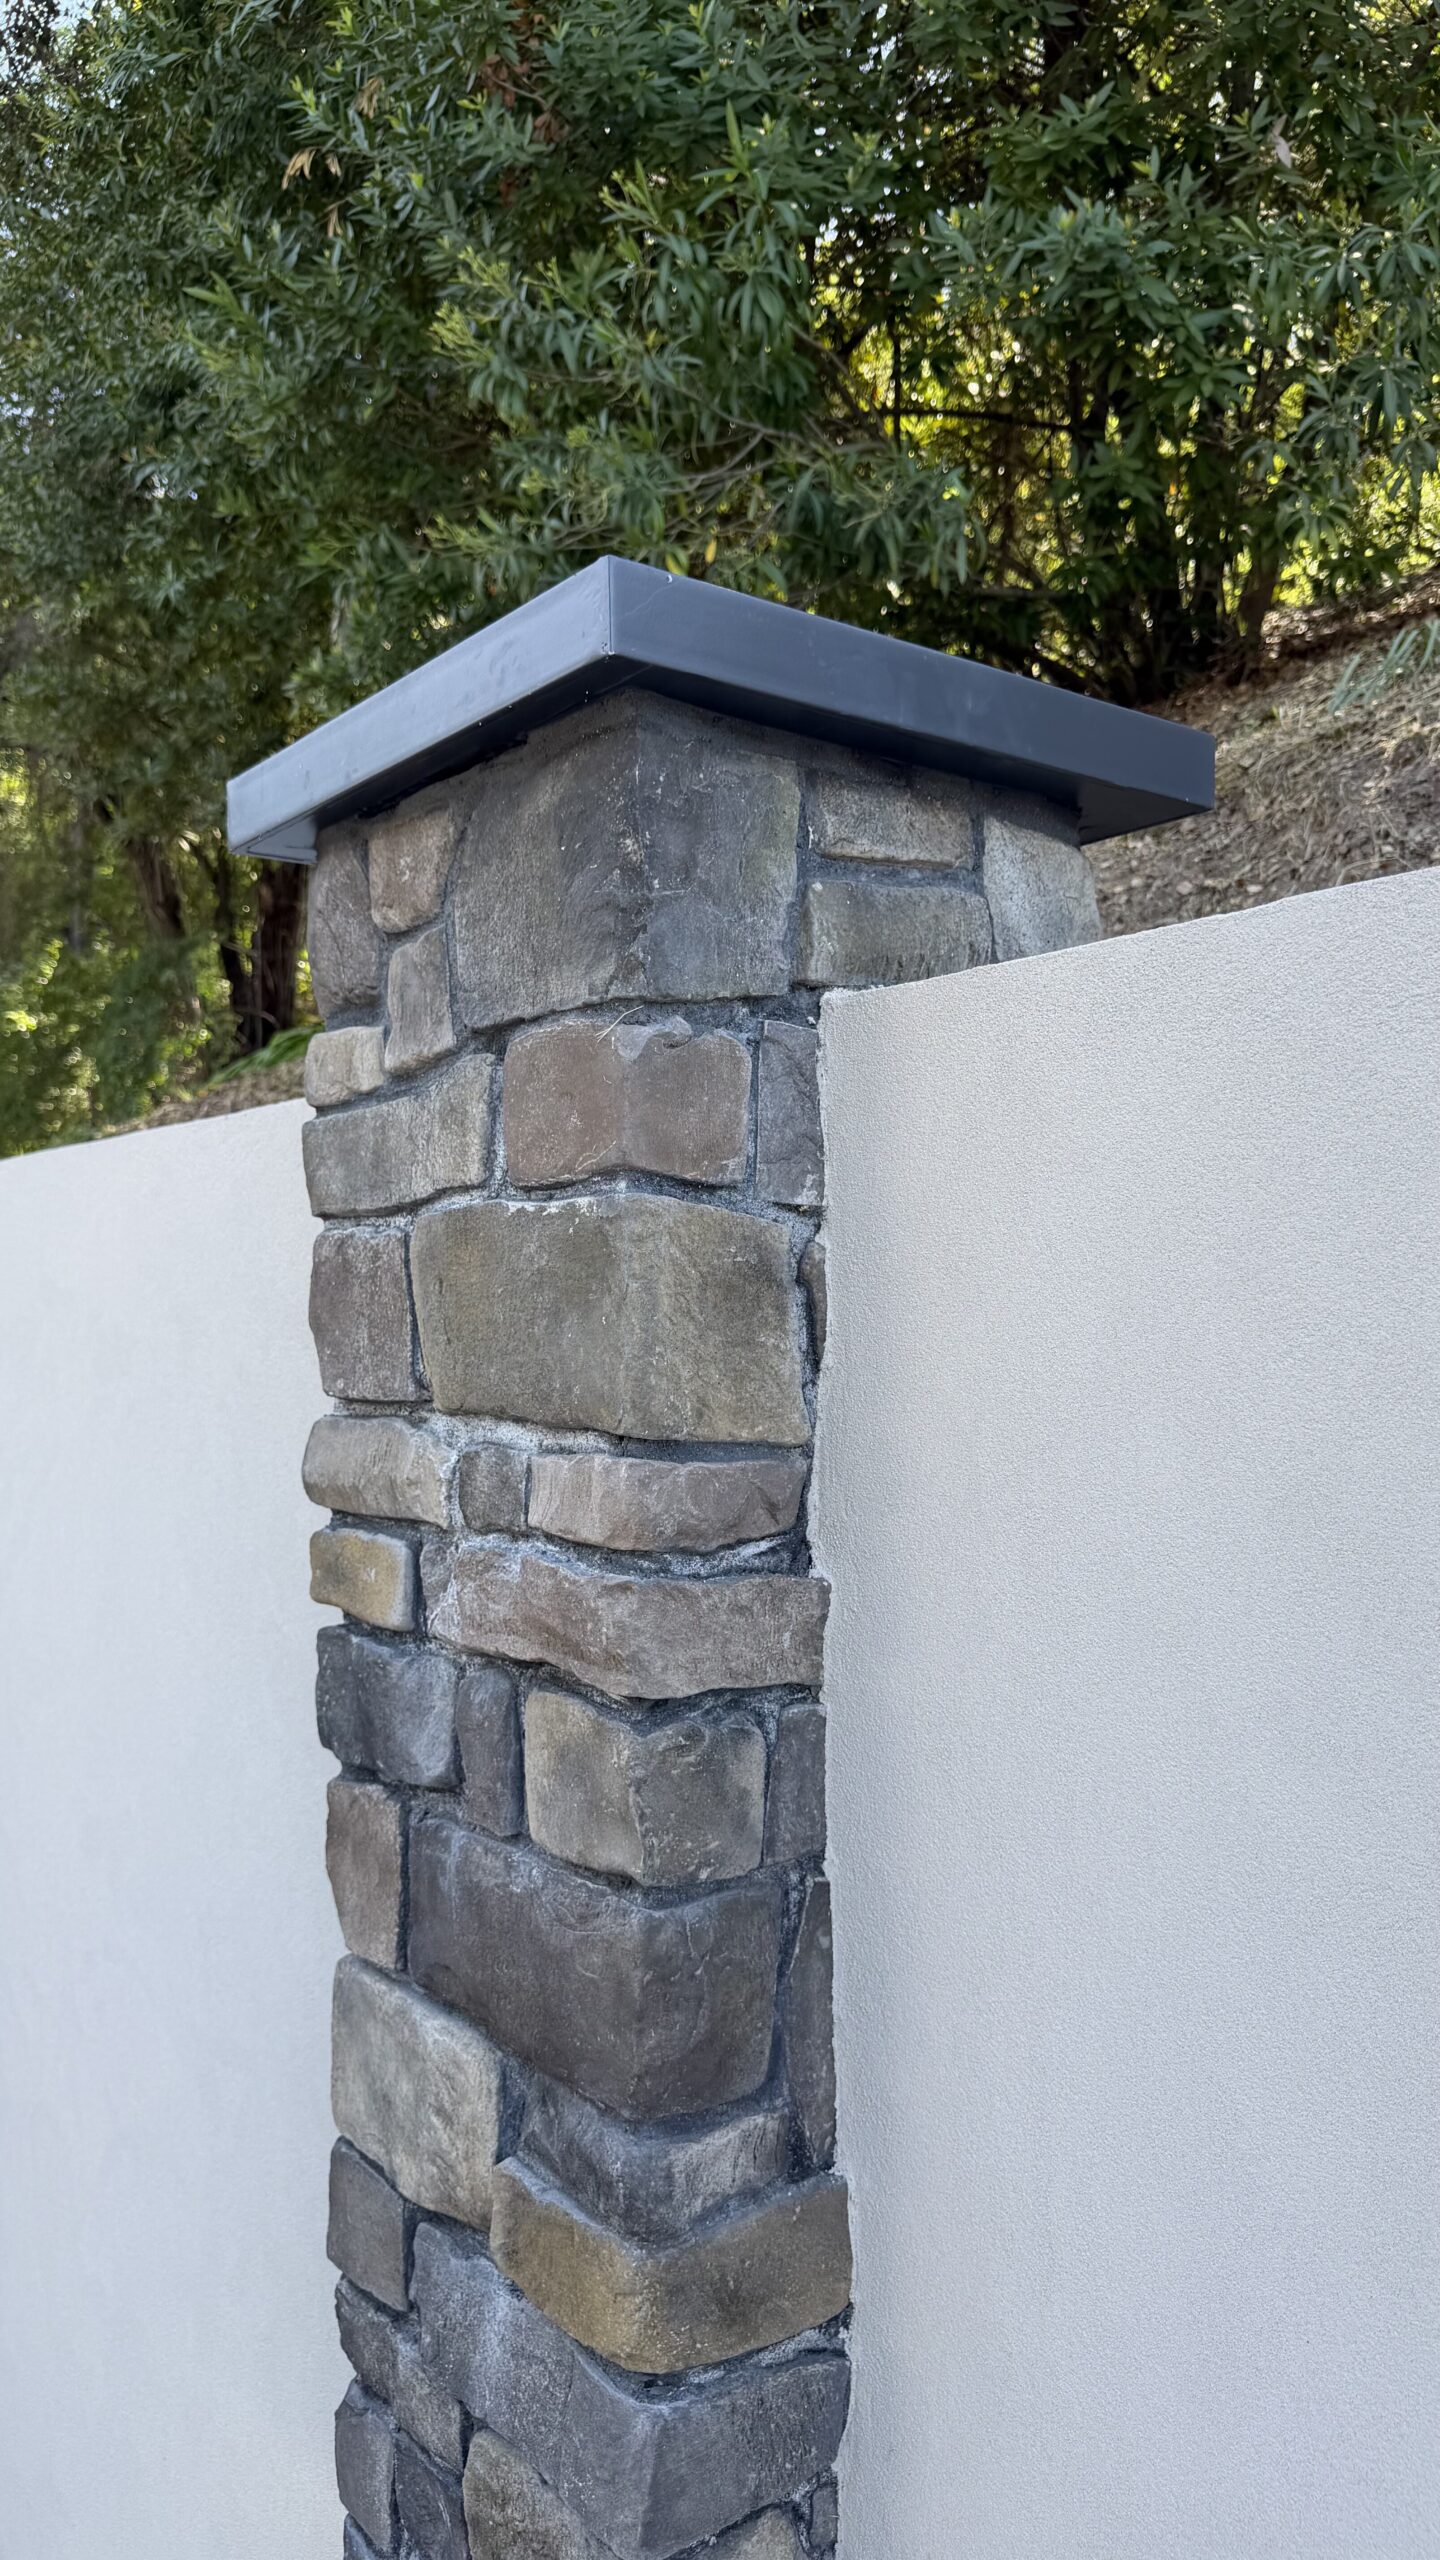
Architectural Concrete Panel Systems
Architectural concrete panel cladding systems, including thin concrete and GFRC panel products, provide the visual weight and material character of concrete at a fraction of the mass and cost of site-poured or structural precast concrete. Complete concrete panel systems include engineered attachment hardware, a continuous WRB, the panel products themselves, and joint treatment appropriate to the assembly design. These systems are used on contemporary commercial construction, institutional buildings, and high-end residential projects throughout San Jose and Silicon Valley.
Rainscreen Cladding Systems
Rainscreen systems are a wall assembly category that can incorporate any of several cladding materials, as described above. The defining feature of a rainscreen system is the ventilated air cavity between the cladding and the WRB. As a complete wall system approach, rainscreen assemblies represent the current best practice in exterior wall moisture management for both residential and commercial construction in the Bay Area, and we recommend them on projects where site conditions, moisture history, or performance goals justify the modest additional cost of the furring layer.
Mixed-Material Cladding Systems
Many of the most architecturally interesting and best-performing exterior wall projects we handle in San Jose involve more than one cladding material in a single facade composition. A contemporary residential renovation might use fiber cement lap siding on primary wall planes with metal panel accents at the entry and gable ends. A commercial building facade might incorporate ACM panels on upper floors with architectural concrete panels at the ground level. A stucco-primary exterior might include composite wood board-and-batten on a specific gable or accent elevation.
Mixed-material cladding systems require careful attention to material transitions, since every interface between two different cladding systems is a potential moisture entry point if it is not correctly detailed. Our experience across the full range of cladding systems is directly useful in these situations, because correctly detailing a transition between fiber cement and metal panels, or between stucco and composite wood, requires familiarity with the specific installation requirements of both materials.
System Selection: Matching the Cladding System to the Building
Selecting the right exterior wall cladding system for a San Jose property is not a single-variable decision. The appropriate system for a given building depends on several factors that interact with each other and that we evaluate as part of every project consultation.
Building Type and Use
Residential and commercial buildings have different performance requirements, code constraints, and maintenance contexts that influence cladding system selection. Residential properties prioritize curb appeal, neighborhood compatibility, and long-term maintenance cost. Commercial properties prioritize durability, fire performance, low maintenance over a long hold period, and in many cases, compliance with architectural standards or tenant requirements.
Architectural Style
The visual character of the cladding system needs to be appropriate to the building’s architectural style and the context of the surrounding neighborhood. A board-and-batten composite wood system is a natural fit on a contemporary farmhouse renovation in Almaden Valley. It is not an appropriate choice for a mid-century commercial building on Stevens Creek Boulevard. Getting this alignment right is as important as any performance consideration.
Site-Specific Conditions
Proximity to the San Francisco Bay, local microclimate humidity levels, sun exposure by elevation, topographic exposure to wind, and the presence of mature trees or adjacent structures that create persistent shade all affect the appropriate cladding system specification for a given site. A north-facing elevation on a shaded property in Willow Glen has a meaningfully different moisture exposure profile than a south-facing elevation on an open hillside in Almaden Valley, and the cladding system should reflect that difference.
Fire Hazard Zone
Properties in Very High Fire Hazard Severity Zones in Santa Clara County, including portions of the Almaden Valley foothills, areas near open space in South San Jose, and hillside locations above the valley floor, are subject to specific code requirements for exterior cladding materials. Non-combustible cladding systems, including fiber cement, metal panels, architectural concrete, and phenolic products, are appropriate for these locations. Wood-based systems, including composite wood and natural wood products, require careful evaluation against applicable fire code requirements before specification.
Existing Wall Assembly Condition
For renovation projects, the condition of the existing wall assembly, including the sheathing, any existing WRB, and the framing behind the sheathing, directly affects what the new cladding system needs to include to deliver good long-term performance. A building with a sound, dry substrate and a reasonably functional existing WRB has different needs than one with moisture-damaged sheathing and no effective drainage plane. We assess the existing assembly condition on every renovation project before making cladding system recommendations.
Budget and Maintenance Tolerance
Different cladding systems have different upfront installation costs and different ongoing maintenance requirements over their service lives. The most cost-effective choice for a given property is not always the lowest-cost installation. A higher-cost system with a 20-year maintenance-free service life may have a lower lifetime cost than a lower-cost system that requires repainting every eight years. We walk through these trade-offs honestly during the consultation so that the decision is based on total cost of ownership rather than installation cost alone.

Free Estimates
Free On-Site Consultations
Common Exterior Wall Problems We Resolve
A significant portion of the exterior cladding work we do in San Jose is remediation work, re-cladding projects on buildings where the existing wall system has failed or is performing inadequately. Understanding the common failure patterns helps property owners recognize when a repair is a short-term fix and when a system-level solution is the more cost-effective path.
Recurring Moisture Intrusion at Windows and Doors
Window and door openings are the most common location for moisture intrusion in San Jose residential buildings. The interface between the window frame and the surrounding cladding is a complex transition that requires specific flashing details to be watertight, and those details were frequently absent or inadequately executed on homes built before current moisture management standards were established. Recurring water staining at the interior face of window and door openings, soft or deteriorated framing at sill corners, and paint failure on interior wall surfaces adjacent to windows are all signs of this failure pattern.
A correctly detailed WRB and flashing system installed as part of a re-cladding project addresses this problem at its source rather than continuing to patch the interior symptoms of an exterior detail failure.
Stucco Delamination and Efflorescence
Stucco that has delaminated from its substrate, sounds hollow when tapped, and shows efflorescence at cracks after rain is a stucco system that has been infiltrated by moisture. The most common cause is inadequate WRB installation or flashing failures at openings and transitions that allow water to enter behind the stucco and become trapped between the stucco and the sheathing. Re-stuccoing over delaminated stucco without correcting the underlying moisture entry points produces the same result in a shorter time.
Siding Rot and Paint Failure at Base Courses
The base of the siding, where the lowest course of material meets grade, roofing, or horizontal surfaces, is consistently the most vulnerable location on a wood or composite siding installation. Inadequate clearance between the siding and grade, mulch piled against the base of the siding, and poorly designed horizontal transitions all concentrate moisture at this location and produce rot in wood products and paint failure in both wood and composite materials. Re-siding with correct grade clearances, correctly designed base flashings, and appropriate trim details at horizontal transitions eliminates this recurring problem.
Failed Caulk at Joints and Penetrations
Caulk at butt joints, corner boards, window and door surrounds, and wall penetrations has a finite service life, and failed caulk is a consistent moisture entry point on every cladding system that relies on it for weather sealing. The correct response to widespread caulk failure depends on the age and condition of the underlying cladding. Where the siding itself is otherwise in good condition, caulk maintenance and touchup is the appropriate repair. Where the cladding has aged to the point that caulk failure is a recurring maintenance burden rather than an isolated repair, complete re-cladding with a system designed to minimize reliance on field-applied caulk for weather sealing is often the more cost-effective long-term solution.
Our Exterior Wall Cladding System Installation Process
Our installation process for complete exterior wall cladding systems is built around the principle that every component of the assembly matters and that the sequence in which those components are installed determines the quality of the finished result.
- Complete On-Site Assessment- We visit the property and conduct a thorough assessment of the existing wall assembly condition, including the substrate, any existing WRB, flashing at all openings and transitions, and the current cladding material. For buildings with a history of moisture problems, we probe suspect areas to assess the extent of any moisture damage behind the cladding face. This assessment is free with no obligation.
- System Recommendation and Material Selection- Based on the assessment findings, the building type, the architectural goals, the site conditions, and the performance requirements, we make a specific cladding system recommendation and walk through the reasoning behind it. We present the material options appropriate for the system and explain the practical differences between them in terms that are useful for making a genuinely informed decision.
- Permit Coordination- We handle building permit applications for the project and coordinate with the City of San Jose building department on any review or inspection requirements applicable to the scope of work.
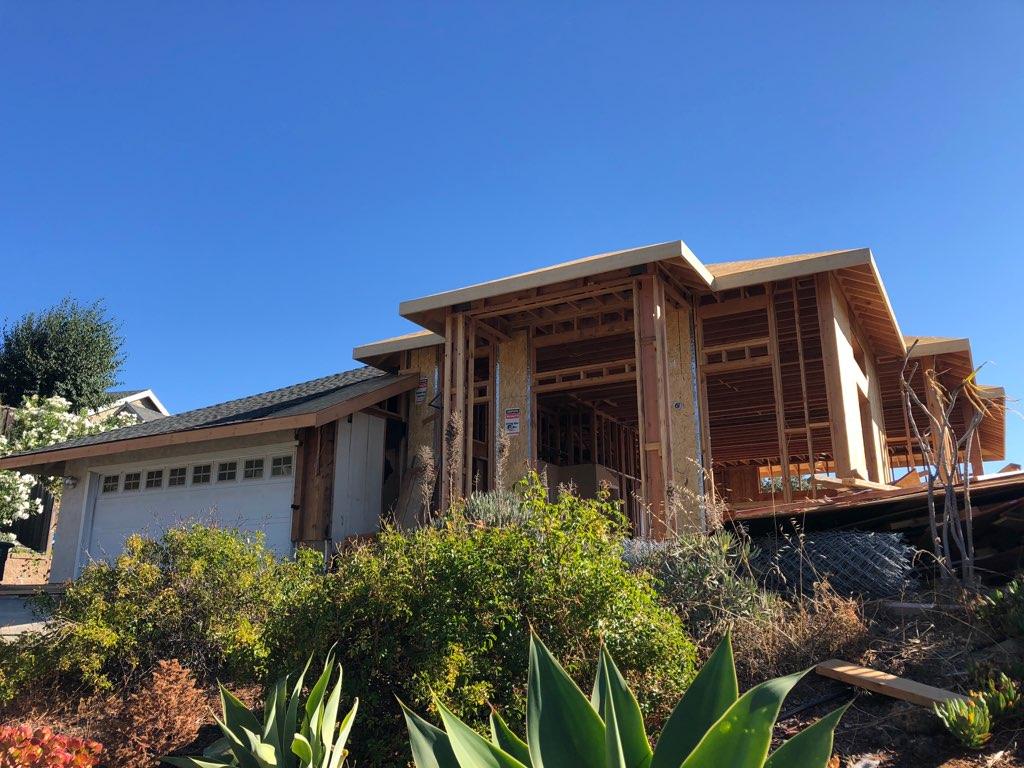
- Existing Cladding Removal- Existing cladding is removed carefully to expose the full substrate surface for inspection. Complete removal is almost always preferable to installing over existing cladding because it gives us full access to assess and correct conditions that would otherwise be concealed by the new installation.
- Substrate Repair and Preparation- The full substrate surface is inspected and any damaged sheathing, compromised framing, or moisture-affected areas are repaired or replaced. The substrate must be in sound, dry condition before any new assembly components are installed. This is the stage where deferred moisture damage is addressed, and it is not something we rush through or estimate from the outside before the cladding is off.
- Water-Resistive Barrier Installation- A continuous, correctly specified WRB is installed over the clean sheathing with fully lapped seams, taped joints, and attention to every detail that affects its continuity and drainage function. This layer is inspected and confirmed before any subsequent components are installed over it.
- Flashing at All Openings and Transitions- Correctly detailed flashing is installed at every window opening, door opening, penetration, horizontal transition, and material interface in the wall assembly. These details are executed according to the specific requirements of the cladding system being installed and the applicable building code requirements.
- Drainage Cavity Installation (Where Specified)- Where the project specification includes a rainscreen cavity, vertical furring strips or drainage mat product is installed over the WRB to create the drainage and drying plane. Ventilation openings at the base and top of each wall plane are confirmed before cladding installation begins.
- Cladding Installation- The selected cladding material is installed according to manufacturer specifications and applicable code requirements, with correct fastening, overlap or joint dimensions, clearances, and expansion provisions throughout.
- Trim, Corner, and Transition Details- All ancillary cladding components are installed at corners, openings, horizontal and vertical transitions, and material interfaces. These details receive the same care as the field cladding installation.
- Finish Work- Caulking, priming, and painting or other finish coats are applied as appropriate to the cladding system being installed.
- Final Inspection and Walkthrough- We inspect the completed installation against the project specification and walk through the finished work with the client before closing out the scope.
San Jose Neighborhoods and Areas We Serve
We serve residential and commercial clients throughout San Jose and the broader South Bay from our base at 137 E Saint James St. Our primary service area covers a 20-mile radius of San Jose.
San Jose Neighborhoods
- Willow Glen – residential re-cladding and complete exterior wall system replacement
- Naglee Park and Roosevelt Park – historic homes receiving updated exterior wall systems
- Rose Garden – premium residential projects
- Almaden Valley and Blossom Hill – residential and hillside construction
- Cambrian Park and South San Jose – mid-century homes with aging wall assemblies
- Downtown San Jose, SoFA District, and Japantown – commercial and mixed-use projects
- North San Jose and Alviso – bay-adjacent properties with specific moisture management requirements
- East San Jose, Five Wounds, and Olinder neighborhoods
- Berryessa and Northeast San Jose
- Northside, Lakehouse, and Market-Almaden communities
Surrounding Communities
- Saratoga (ZIP 95070) – premium residential and commercial
- Milpitas (ZIP 95035) – residential and commercial
- Evergreen and East San Jose (ZIP 95135)
- Los Gatos, Campbell, Santa Clara, Sunnyvale, and Cupertino
- Fremont and other South Bay communities within 20 miles of San Jose
Why Choose San Jose Stucco & Plastering for Exterior Wall Cladding Systems
30+ Years of Exterior Wall System Experience- Exterior wall systems are not a secondary service we offer alongside a general contracting practice. They are the core of what we do. Three decades of focused work on exterior walls in the San Jose market has produced a depth of understanding about how these assemblies perform, where they fail, and what it takes to install them correctly the first time.
Systems Thinking, Not Just Surface Materials- We evaluate every project at the assembly level before making material recommendations. The right surface material installed on the wrong substrate with inadequate moisture management is not a good cladding system. We address all of it.
Complete Range of Cladding Systems- We install stucco, fiber cement, composite wood, metal panels, ACM, phenolic and HPL systems, architectural concrete panels, rainscreen assemblies, and mixed-material exterior systems. That breadth means we can recommend the system that is genuinely right for a given project rather than defaulting to whatever one product we are most familiar with.
Commercial and Residential Experience- We work across the full range of project types in the San Jose market, from historic residential restoration projects in Naglee Park to commercial facade renovations on office buildings throughout Silicon Valley.
Price-Match Guarantee- We will match any competitor’s written estimate. Bring us a written quote from another licensed contractor and we will match it.
Fully Licensed and Insured- All work is performed by our own trained crew under full insurance and California contractor licensing.
Free Estimates and Free On-Site Consultations- We do not charge for project assessments or written estimates. We visit the site, assess the full wall assembly condition, and give you a thorough, accurate estimate with no obligation.
Frequently Asked Questions About Exterior Wall Cladding Systems in San Jose
What is the most important component of an exterior wall cladding system? Every component matters, but the water-resistive barrier and the flashing at openings and transitions are the components whose failure causes the most damage. The outer cladding material gets the most attention because it is visible, but the WRB and flashing are what actually protect the building structure from moisture damage. A premium surface material installed over an inadequate WRB and flashing system will still produce moisture-related failures, while a modest surface material installed over a correctly executed WRB and flashing system will perform reliably for decades.
How do I know if my existing wall assembly has moisture damage? The most reliable indicators are interior symptoms adjacent to exterior wall surfaces: water staining on interior walls or ceilings near the building perimeter, soft or spongy wall surfaces when pressed near windows and doors, visible mold or mildew on interior wall surfaces, and paint peeling on the interior side of exterior walls. On the exterior, hollow-sounding stucco when tapped, visible efflorescence at cracks, and paint that fails repeatedly in the same locations despite multiple repair attempts all suggest moisture is getting into the wall assembly. We conduct a thorough site assessment, including probing suspect areas, as part of every consultation on properties with a moisture history.
What is the difference between a one-coat, two-coat, and three-coat stucco system? Traditional three-coat stucco consists of a scratch coat, a brown coat, and a finish coat, applied in sequence over metal lath. Two-coat systems use a base coat and finish coat over a board substrate. One-coat systems use a single thick application over lath. Three-coat systems are generally considered the most durable and are the traditional standard in California stucco construction. The appropriate system for a given project depends on the substrate, the design intent, and the performance requirements. We discuss the trade-offs between systems during the consultation.
Can you install a new cladding system over existing stucco without removing it? In some cases, but we generally recommend against it unless a thorough assessment confirms that the existing stucco is firmly adhered, the substrate is in good condition, and the new cladding system can be correctly installed over the added thickness without compromising clearances, flashing details, or moisture management. In most renovation situations, removing the existing stucco is the more reliable approach because it gives us full access to inspect and address the substrate condition before the new assembly goes on.
How does a mixed-material cladding system affect the project cost? Mixed-material systems typically involve more complex transition detailing than single-material facades, which adds some labor cost relative to a straightforward single-material re-cladding. The material cost is a function of which specific products are used on each portion of the facade. For projects where the design intent calls for mixed materials, we scope the full project including all transitions and provide a complete estimate that accounts for the complexity.
How long does a complete exterior wall cladding system installation take? Duration depends on the building size, the system complexity, the extent of any substrate repair needed, and the number of cladding materials involved. A standard single-family residential re-cladding project typically takes two to three weeks from demolition through final finish. Commercial projects and mixed-material installations with significant substrate repair may run longer. We provide a realistic schedule estimate as part of the initial consultation.
Do you work with architects and designers on cladding system specifications? Yes. We work with architects, designers, and building enclosure consultants on both residential and commercial projects where the exterior wall cladding system is being developed as part of a broader design process. We can provide input on product selection, installation feasibility, and transition detailing, and we execute installations according to project specifications developed by the design team.
Get a Free Estimate for
Exterior Wall Cladding Systems in San Jose